A burst pipe inside a wall or ceiling shows up as running-water sounds with every tap off, a moving water meter, spreading stains, bubbling paint or a bowing ceiling. Close the main shut-off, then find the wettest point with a moisture meter and open the drywall there. The plumber cuts out the damaged section, and the cavity is dried and checked for mould before it is closed.
- The water meter is the quickest test: if it moves with every fixture off, water is escaping somewhere.
- Water travels along framing and pipes, so the stain is often below or beside the break, not on it.
- Opening the wall is part of the repair, not a failure of it; a wet cavity cannot dry behind intact drywall.
- Pipes in exterior walls, over garages and in bulkheads near outside corners are the usual freeze-burst suspects.
- Cut drywall at a clean line above the wet zone so the patch is straightforward and the cavity can be inspected.
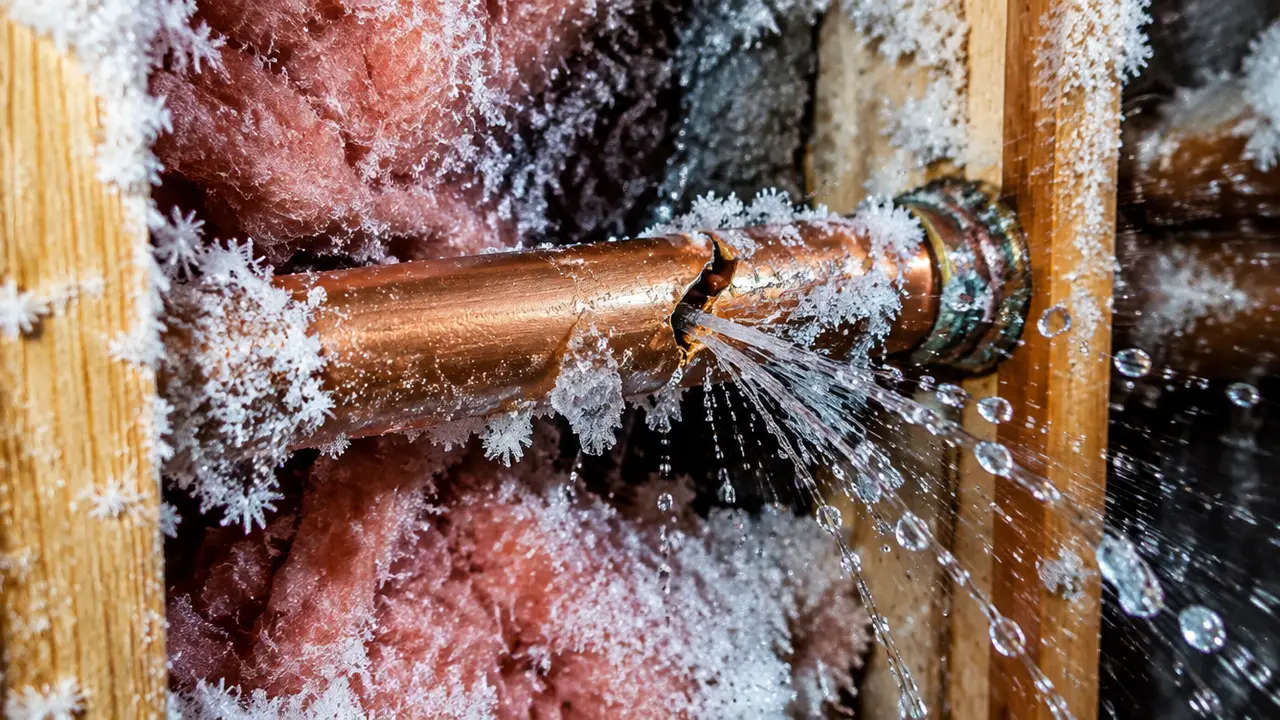
01 /How do you know a pipe has burst inside a wall?
You hear water moving when nothing is running, and the water meter confirms it. A supply pipe inside a wall is under pressure all the time, so a break sprays or streams into the cavity continuously until the main is closed. The signs come in a fairly predictable order.
| Sign | What it means | How fast it appears |
|---|---|---|
| Hissing or rushing sound in a wall with taps off | Water escaping under pressure | Immediately |
| Meter dial or low-flow indicator moving | Water leaving the system somewhere | Immediately |
| Sudden pressure drop at taps | A large break diverting flow | Immediately with big breaks |
| Damp baseboard, swollen trim or water at the floor line | Water running down the cavity | Minutes to hours |
| Stain, bubbling paint or wallpaper lifting | Drywall face saturated | Hours |
| Bowing or dripping ceiling below | Water collecting on the ceiling board | Minutes to hours |
| Musty smell, dark spots at the base of the wall | Wetting that has gone on for days | Days to weeks |
The last row is a warning in itself. A cavity that smells musty has been wet longer than a single burst explains, and an adjuster will read it that way. The insurance guide explains why sudden and gradual losses are treated so differently.
02 /How do you use the water meter to confirm a leak?
Turn off every fixture and appliance that uses water, then watch the meter for a few minutes. Most residential meters have a small triangle, star or dial that turns with even a slow flow. If it moves with everything off, water is leaving the system.
- Stop all use
No taps, toilets refilling, ice maker, humidifier, water softener regeneration or irrigation.
- Watch the low-flow indicator
Any movement means water is flowing past the meter.
- Close the main shut-off
If the indicator stops, the leak is downstream of the valve, inside the house.
- Isolate branches
Close the water heater's cold supply valve and reopen the main. If the meter stops moving, the leak is on the hot side.
- Keep the main closed if the leak is real
Until the break is found and repaired, or capped.
If the meter keeps moving after the main is closed, the valve is not sealing or the leak is between the meter and the valve. A meter that sits outside, or a leak that shows up as a wet lawn, points toward the slab and yard guide.
03 /Why is the stain not where the break is?
Because water follows gravity and the path of least resistance, which in a wall means down the studs and along pipes, and in a ceiling means along joists until it finds a low point or a hole. A break in a second-floor bathroom wall can show up as a stain in the ceiling of the room below and two joist bays over.
- Water runs along the top of a pipe or a joist and drips from the lowest point, often a fitting or a light fixture.
- Vapour barrier and insulation can channel water sideways before it reaches the drywall.
- Ceiling stains tend to form near pot lights, fan grilles and seams, where there is a gap.
- The wettest reading with a moisture meter, not the biggest stain, is the best guide to where to open.
Supply pipes that burst from freezing are usually in the cold spots shown above. Why those spots freeze is the subject of the sister site BurstPipes.ca; for this incident, the diagram tells you where to look first.
04 /How do you find the exact spot without tearing out a whole wall?
Narrow it down with sound, the plumbing layout and a moisture meter, then cut a small inspection opening. Pinpointing saves drywall, time and the claim value, because adjusters expect a reasonable, targeted opening rather than a demolition.
| Method | What it tells you | Limits |
|---|---|---|
| Listening with the main briefly open | Where the hiss is loudest | Only works while water is flowing |
| Plumbing layout | Which walls carry supply lines to nearby fixtures | Old renovations may have rerouted lines |
| Pin or pinless moisture meter | Wet and dry zones on drywall | Reads surface to shallow depth only |
| Thermal camera | Cool, evaporating patches on the wall face | Shows temperature, not water; needs interpretation |
| Small inspection hole | What is actually in the cavity | A patch to repair afterward |
Restoration companies and some plumbers carry moisture meters and thermal cameras, and a thorough one maps the wet area on the wall with tape or a marker before anything is cut. That map also belongs in your claim file.
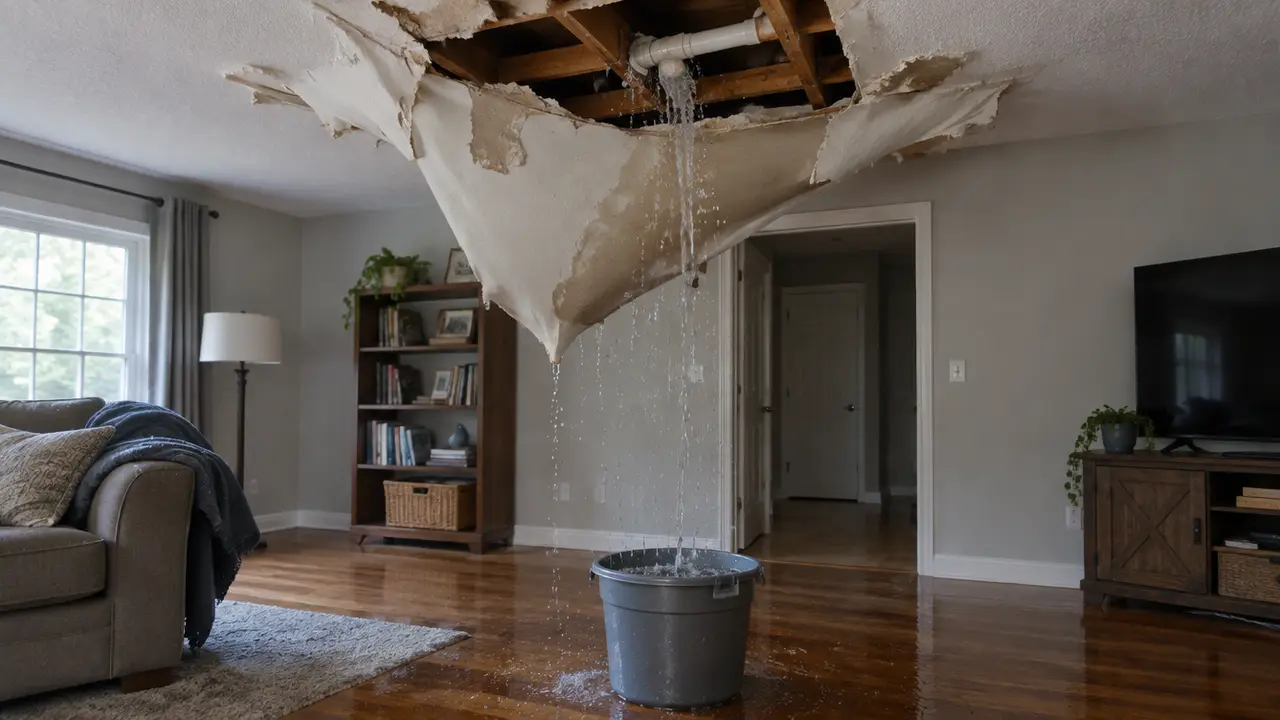
05 /How is a wall or ceiling opened for the repair?
With a clean horizontal cut above the wet zone, wide enough to reach the pipe and let the cavity dry. For a wall, that often means cutting the drywall 30 cm or more above the highest wet reading. CMHC's flood advice is to discard wet drywall at least 30 cm above the flood water level, and the same logic of cutting past the wet line applies to a burst.
- Water off, power to the area off
Close the main and switch off circuits for any outlets or lights in the wall or ceiling being opened.
- Mark the wet zone
Use moisture readings to outline where the drywall is wet, then add a margin.
- Cut a clean opening
Score along a straight line between studs or joists so the patch is square and easy to finish.
- Remove wet insulation and vapour barrier
Wet batts are bagged and removed; they hold water against the framing.
- Repair the pipe
The plumber cuts out the damaged section and joins new pipe with fittings rated for the material.
- Dry and verify
Air movers and dehumidifiers run until the framing reads dry; the cavity is checked for mould before closing.
Ceilings follow the same steps with one difference: work from a ladder beside the wet zone, not beneath it, and expect wet insulation to fall. The electrical safety guide covers the risks of opening a sagging ceiling.
06 /What does the repair inside the wall involve?
Cutting out the split or failed section and joining new pipe of the same material, then pressure-testing before the wall is closed. The method depends on the pipe:
| Material | Usual repair | Watch for |
|---|---|---|
| Copper | Cut out the split, join a new piece by soldering, pressing or rated push-fit couplings | Other splits along the same frozen run |
| PEX | Cut out the damaged length and join with the fitting system the house uses | Kinks and fittings that pulled apart |
| CPVC | New section solvent-welded with CPVC cement and fittings | Brittle pipe cracking near the repair |
| Galvanized steel | Replace the damaged run | Corroded threads and restricted flow elsewhere |
| Poly-B | Approved poly-B fittings, and a quote to repipe | Insurer conditions on this pipe type |
Permits vary by municipality. Calgary, for example, lists repairing a leak in a water distribution system among the jobs that do not need a plumbing permit, while replacing water lines or altering the system does; ask your own municipality before a repair grows into a reroute.
Any permanent fitting that will be closed inside a wall should be one rated for concealed use; ask the plumber. The Burst Pipe Repair Matcher flags that a wall or ceiling location adds opening, drying and a mould check to the job, and repair by pipe material explains each method.
07 /How long before the wall can be closed again?
Only when moisture readings on the framing and any remaining drywall are back to the dry baseline, which for a clean-water burst caught quickly is often several days. Closing a wall early traps water against wood and the back of the drywall, which is exactly where mould starts.
Health Canada advises that a house and furnishings are less likely to grow mould if they are dried within 48 hours, which is why the cavity is opened promptly rather than left to dry through the paint. The drying guide explains the readings and equipment, and the rebuild pricing is in burst pipe repair cost.
FAQQuestions people ask
What does a burst pipe in the wall sound like?
A steady hiss, rush or trickle from inside the wall while every tap and appliance is off. It stops when you close the main shut-off.
Can a pipe burst inside a wall without showing water?
For a while, yes. Water can run down the cavity into the floor or the ceiling below before it stains the wall. Check the water meter with everything off.
Do I have to cut the drywall to fix a pipe in the wall?
Almost always. The pipe must be reached to be repaired, and the cavity must be opened to dry. A clean opening is part of a proper repair.
How do I find which pipe burst in the ceiling?
Close the main, then use a moisture meter to find the wettest area and trace the supply lines to fixtures above. The stain is often offset from the break because water runs along joists.
Can I just let a wet wall dry on its own?
Not if the cavity is wet behind the drywall. Paint and drywall slow drying so much that mould can start first. Open it, remove wet insulation and dry it with equipment.